
Learn how to add your company to the IPXO Portal and get access to the platform's services.
Overview
Before you can access IPXO services, you need to add and verify your company. This article explains how to complete your company setup after signing up, as well as how to add additional companies later.
Setting Up Your Company After Sign-Up
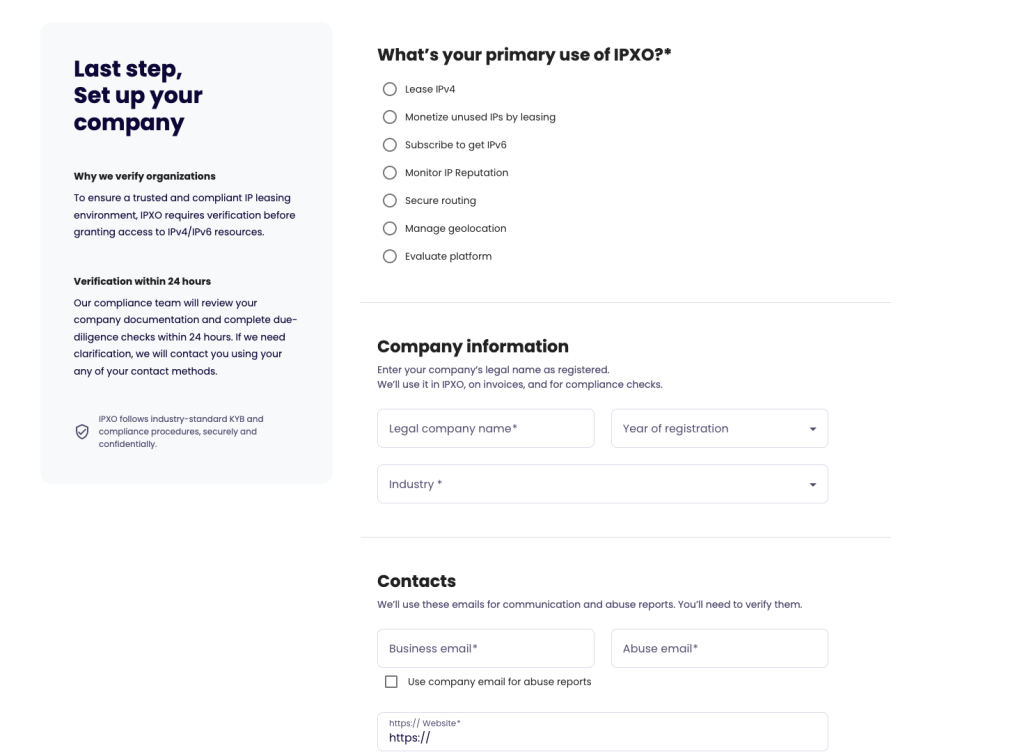
Step 1 — Select your primary use and fill in company information
After completing the sign-up process, you will be prompted to set up your company. Select your primary use of IPXO from the list of options. Then, under Company information, enter your Legal company name, Year of registration, and Industry.
Step 2 — Enter your contacts and billing information
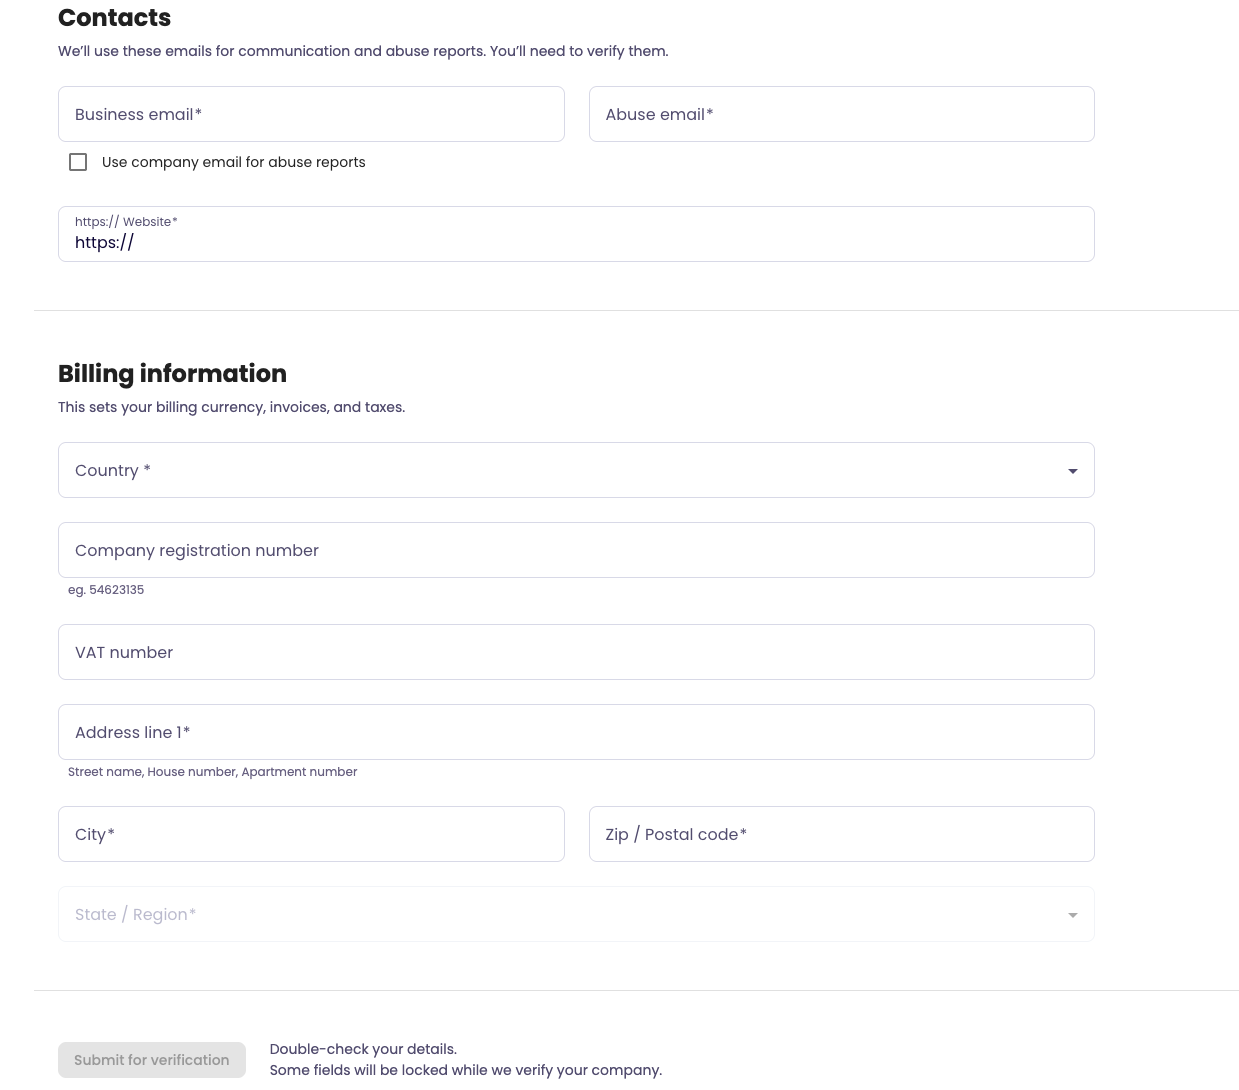
Provide your Business email, Abuse email, and Website. Then fill in your Billing information — country, company registration number, VAT number, and address.
Note: Double-check your details before submitting. Some fields will be locked once your company is under review.
Step 3 — Submit for verification
Click Submit for verification. IPXO's compliance team will review your company within 24 hours. Once verified, your company status will change from Pending to Active.

Adding Additional Companies
You can add more than one company to the IPXO Portal under the same account.
Step 1 — Open the Add New Company page
In the left sidebar, click your company name and select Add new company.

Step 2 — Complete the company form
Follow the same steps as above — select your primary use, fill in your company and billing information, and click Submit for verification.

IPXO will review the new company within 24 hours. Once approved, it will become active and accessible from your account.